One of the most familiar elements in any dance studio is a ballet barre. When you first open your dance studio, it should be one of your first purchases before your doors open. From the pros and cons of different types of ballet barres, to the standard ballet barre height for your students, this is what you should keep in mind when installing a ballet barre in your studio.
Why You Need A Ballet Barre
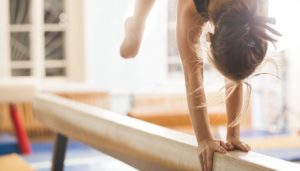
Whether you teach classical ballet or not, you need a ballet barre. Barre exercises promote strength and endurance by working the abs, arms, legs, and back, and strengthen these muscles to endure a wide variety of movements in all types of dance–not just ballet.
The stretches performed during barre exercises also help your students stay flexible and move gracefully through any type of dance.
Stretching in barre exercises also helps relieve pain and tension that students may experience, making them better able to withstand grueling rehearsals and long spans of instruction time. And, students that perform barre exercises often will be amazed at how they can hold tough positions better, and longer each time they attend class.
Steps For Installing a Ballet Barre
Ballet barre installation is a fairly easy process, with a few key decisions, as we’ll discuss.
- Decide on the type of barre you want
- Gather the necessary materials
- Figure out the correct ballet barre height
- Build or install the barre safely
- Celebrate and begin using it
We know the process is not this cut and dry, though. Let’s break these steps down further so you can choose the perfect barre for your dance studio!
Types Of Ballet Barres
The type of ballet barre you choose matters. Is one better than the other? The most simple answer to this question is that it depends. There are pros and cons to the two most common types of ballet barres: portable and wall-mounted.
Portable Ballet Barres
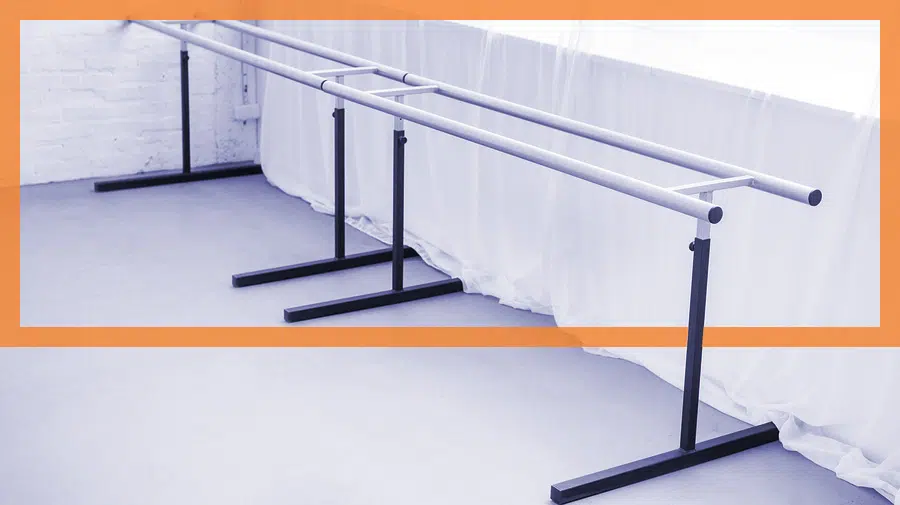
Pros:
- Because a portable barre is freestanding, students can stand on both sides of it to perform exercises, making it more efficient if you have large classes
- You can move it to any room that needs it, or even your lobby during open houses
- Portable barres are much more affordable than wall-mounted ones, often as little as one-quarter of the cost of wall-mounted barres depending on the type you get
- Because of this low price, you can get multiple barres in various heights to accommodate different ballet barre heights for different students
Cons:
- Setting up a portable ballet barre can be quite difficult, and you’ll face this tricky set-up and break down each time
- If not properly installed, a portable ballet barre doesn’t give optimum support to a dancer’s legs while performing stretches and routines
- This lack of support and instability can be dangerous for your students, making portable barres a risky choice for the long-term
Wall-Mounted Ballet Barres
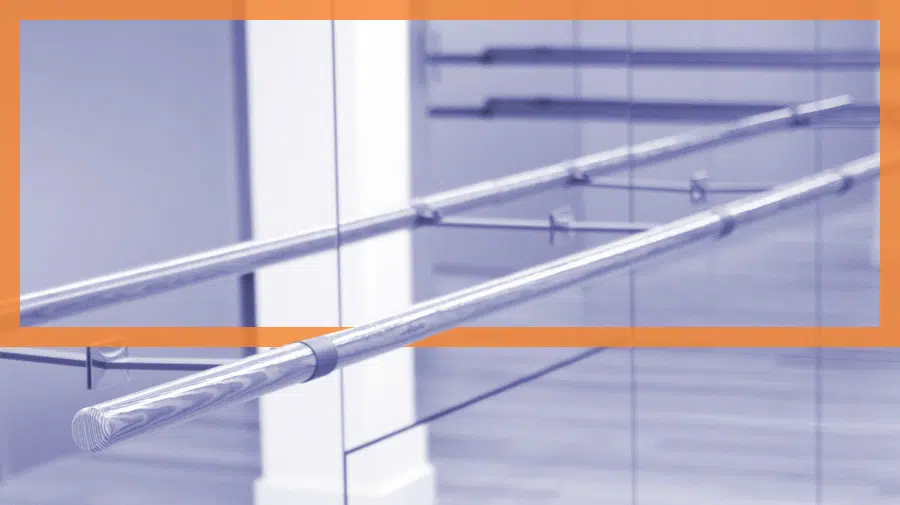
Pros:
- These types of barres are significantly more durable, making it the better choice for weight-bearing exercises and routines
- When properly installed, wall-mounted barres are much safer and more stable than portable ones
- You only need to install a wall-mounted barre once, which means you won’t have to worry about setting it up before each class or after moving it
Cons:
- You can only use one side of it because on the other side is the wall, making it more difficult to manage larger classes
- Wall-mounted barres are significantly more expensive than portable ones, and you’ll also have to pay for professional installation
- Because it’s fixed to the wall, once you choose your ballet barre height, that is the height it will be permanently (or you can install a double barre with two different heights)
How To Install A Wall-Mounted Ballet Barre
Even with these drawbacks, a wall-mounted ballet barre is usually your best choice for long-term use. While they can be more expensive and aren’t as flexible for a growing studio, they keep your student safer which is your #1 concern.
Due to this focus, you should also opt for professional installation. But that doesn’t mean there aren’t a few ways to prepare beforehand. First, decide on your ballet barre height. We give some recommendations for this below.
Before you proceed with the installation, also make sure you have all materials gathered for your installation crew, such as your ballet barre brackets.
The number of brackets you need will depend on how many barres you plan to install. Brackets are typically pre-paired with screw and you may need heavy-duty wall anchors for added stability if the wall does not have a stud to drill into.
Some companies also sell barre kits with all the pieces you may need, but be sure to check and count those pieces before calling in your installation crew. It’s better to over-prepare than risk delays and added fees.
Finally, have your space prepped. If you need to paint the wall before installation, do that at least a day or two ahead of time. Then, save some paint for touch-ups after installation in case of scratches or missed drill holes.
How To Find The Perfect Ballet Barre Height
The standard ballet barre height should come to the waist level of an average adult. If you’re installing one barre and not a double barre, it should be approximately 42-44 inches from the floor for an adult and 32-34 inches from the floor for children.
The barre should also be spaced far enough away from the wall. Assuming your ballet barre dimensions are roughly 1.75 inches in diameter, from the inside of the barre to the wall, there should be approximately 7.25 inches of space. From the outside of the barre to the wall, there should be approximately 9 inches.
A double barre is a great investment if your dance studio serves both children and young adults. With a double barre, the upper barre accommodates the standard ballet barre height of young adults and adults, and the lower barre accommodates children.
However, should you need a barre installed even lower to the floor than this, it might be a good idea to get another smaller portable barre with adjustable height. Children grow like weeds, and the height they need at the beginning of the class season compared with the end of the season, could actually change drastically.
Standard Dance Barre Height Installations
| User Group | Recommended Height | Details |
|---|---|---|
| Youth | 32 to 34 inches | Ideal for young dancers, ensuring they are able to comfortably reach the ballet barre at arm’s length. Perfect for dance studios that host children’s classes. |
| Adults | 42 to 44 inches | Standard height for adult dancers, providing an optimal position for various exercises and stretching routines in studio barres or personal ballet barre settings. |
| Different Stature | Adjustable (from 32 to 48 inches) | Adjustable barre heights cater to dancers of different stature, making them suitable for diverse groups and ensuring maximum flexibility in studio space. Freestanding barres and extra barres are great options for adjustable heights. |
When purchasing ballet barres, consider the needs of all your students to ensure a comfortable and effective practice environment. Adjustable and freestanding barres can offer versatility for both youths and adults alike.
Raise the Barre at Your Studio
Hopefully, this post made your ballet barre installation a little easier. With a little planning and the right tools, your studio can meet the needs of your students.
Have more questions about setting up your studio? At Studio Director, it’s our mission to make studio ownership easier. Our studio management software streamlines key administrative tasks like registration and payments so you can focus on setting up your perfect studio. We’ve also created comprehensive guides to some of the most common questions studio owners have about starting their studio, such as finding the right studio location, choosing flooring, and hanging dance studio mirrors.
We serve as your silent partner, automating key administrative tasks so you can focus on your students. From online registration to class scheduling to payment processing, we raise the barre for what you and your team can accomplish. Learn more or schedule a demo with Studio Director today!